Pages

October 6, 2010

Chicken Parmesan

This is a go-to dinner for us. It is very easy and comes together rather quickly.


Chicken Parmesan

Chicken:
4 Boneless, Skinless Chicken Breasts
1 ½ C. Italian Bread Crumbs
¼ C. Grated Parmesan
1 Tbsp. Oregano
1 Tbsp. Basil
1 Tbsp. Garlic Powder
1 C. Flour
2 Eggs

Marinara:
2 (15 oz) Cans Hunts Tomato Sauce
1 tsp. Sugar
1 tsp. Oregano
1 tsp. Garlic Powder
¼ C. Grated Parmesan

Finishing:
1 ½ C. Shredded Mozzarella
1 lb. Pasta

Preheat the oven to 450°F.

Put the chicken breasts side by side on a cutting board and lay a piece of plastic wrap over them. Pound the chicken breasts with a flat meat mallet (or the bottom of a heavy saucepan), until they are about 1/2-inch thick.

Put the flour in a shallow bowl and season with a fair amount of salt and pepper; mix with a fork to distribute evenly. In a wide bowl, beat the eggs until frothy. Mix the bread crumbs, parmesan, oregano, basil, and garlic powder in a third bowl.

Lightly dredge both sides of the chicken cutlets in the seasoned flour, and then dip them in the egg wash to coat completely, letting the excess drip off, then dredge in the bread crumbs.


Heat olive oil over medium-high flame in a large oven-proof skillet. When the oil is hot, add the cutlets and fry for 4 minutes on each side until golden and crusty, turning once.


Meanwhile, combine the marinara ingredients.

Fill the bottom of a baking dish with one half of the tomato sauce. Place the cutlets on top of the sauce. Ladle the remaining tomato sauce over the chicken and sprinkle with mozzarella.


Bake for 30 minutes or until the cheese is bubbly and the internal temperature of the chicken reaches 165°F for 15 seconds.

Serve over pasta.

Cinnamon Rolls

I generally detest cinnamon, with only one exception – cinnamon rolls. I think that it may have something to do with the copious amounts of icing that typically drowns out most of the cinnamon taste.

When I saw this recipe, the maple icing intrigued me, and was a big factor in why I chose to make it with my standard cinnamon rolls. If you wanted to stick with the more traditional vanilla icing, simply omit the coffee and replace the maple flavoring with vanilla extract.

This makes a lot of cinnamon rolls, so unless you are going to a large event or plan on giving them away, you may want to halve (or even quarter) the recipe. A full recipe results in forty rolls.


Cinnamon Rolls

Rolls:
4 C. (32 oz) Cold Water
2 ½ Tbsp. (1.65 oz) Instant Yeast
22 ¾ C. (5 lbs) Bread Flour
6 ¼ C. (20 oz) Cake Flour
1 C. (4 oz) Powdered Milk
5 ½ tsp. (1 oz) Salt
1 ¾ C. (12 oz) Sugar
2 C. (16 oz) Butter, Well Softened
10 Eggs
2 tsp. Cardamom

Filling:
2 C. Brown Sugar
2 Tbsp. Cinnamon

Maple Frosting:
2 lb. Powdered Sugar
2 tsp. Maple Flavoring
½ C. Milk
¼ C. Melted Butter
¼ C. Brewed Coffee
⅛ tsp. Salt

Mix the dough ingredients together on low speed for approximately 6 minutes until a smooth dough is formed. Allow the dough to rise for 1 ½ hours, covered in a lightly oiled bowl.

When the dough has risen, punch it down. Cut the dough in half, and set one half aside. Roll the dough out into a 24x32 rectangle, or smaller if needed.


Brush the surface with melted butter. Sprinkle half of the filling mixture evenly on top of the dough. Roll-up tightly to form a 32" long jelly roll.


Crimp the edges when finished rolling. Cut into 1 1/2" pieces. Repeat this procedure with the remaining dough.


For individual rolls: Grease a high-sided baking pan. Place the cut rolls 2" apart on to the greased pan. Making sure each roll is evenly spaced. Press down on each roll to slightly flatten. Cover with plastic wrap, and allow to rise for 45 minutes.

For pan rolls: Grease several high-sided cake pans. Place the cut rolls evenly spaced, but not touching, into the greased pans. Press down on each roll to slightly flatten. Cover with plastic wrap, and allow to rise for 45 minutes.


Bake at 350F degrees for 25 minutes, until golden brown.

For the frosting, mix together all ingredients listed and stir well until smooth. It should be thick but pourable. Taste and adjust as needed. Generously drizzle over the warm rolls.


Source: Icing adapted from The Pioneer Woman Cooks (Ree Drummond)

June 6, 2010

Chicken & Rice Casserole

I actually saw this recipe in a Campbell’s soup ad. The picture looked really good, so I used their recipe as the basis for mine. It is a super quick and easy dinner that has plenty of leftovers for Tim’s lunch the next day.


Campbell’s Chicken & Rice Casserole

2 (10 3/4 ounce) Cans Campbell's Cream of Potato Soup
2 2/3 C. Water
2 C. Uncooked Long-Grain White Rice
3-4 C. frozen mixed vegetables
1 tsp Thyme
4 Boneless Skinless Chicken Breast Halves
1/2 C. Shredded Cheddar Cheese
Stir the soup, water, rice, and vegetables in a 9" x 15" shallow baking dish.


 Top with chicken. Sprinkle the chicken with the thyme. Season with salt and pepper as desired. Cover.


 Bake at 375 degrees for 45 minute or until done. Top with cheese.


Adapted from Campbell's Kitchen

May 26, 2010

Doughnuts

Doughnuts have always been on my “to-do” list, but I was always a bit intimidated. After surviving making bagels, I figured that the time had come to take on the challenge.

A few helpful hints:

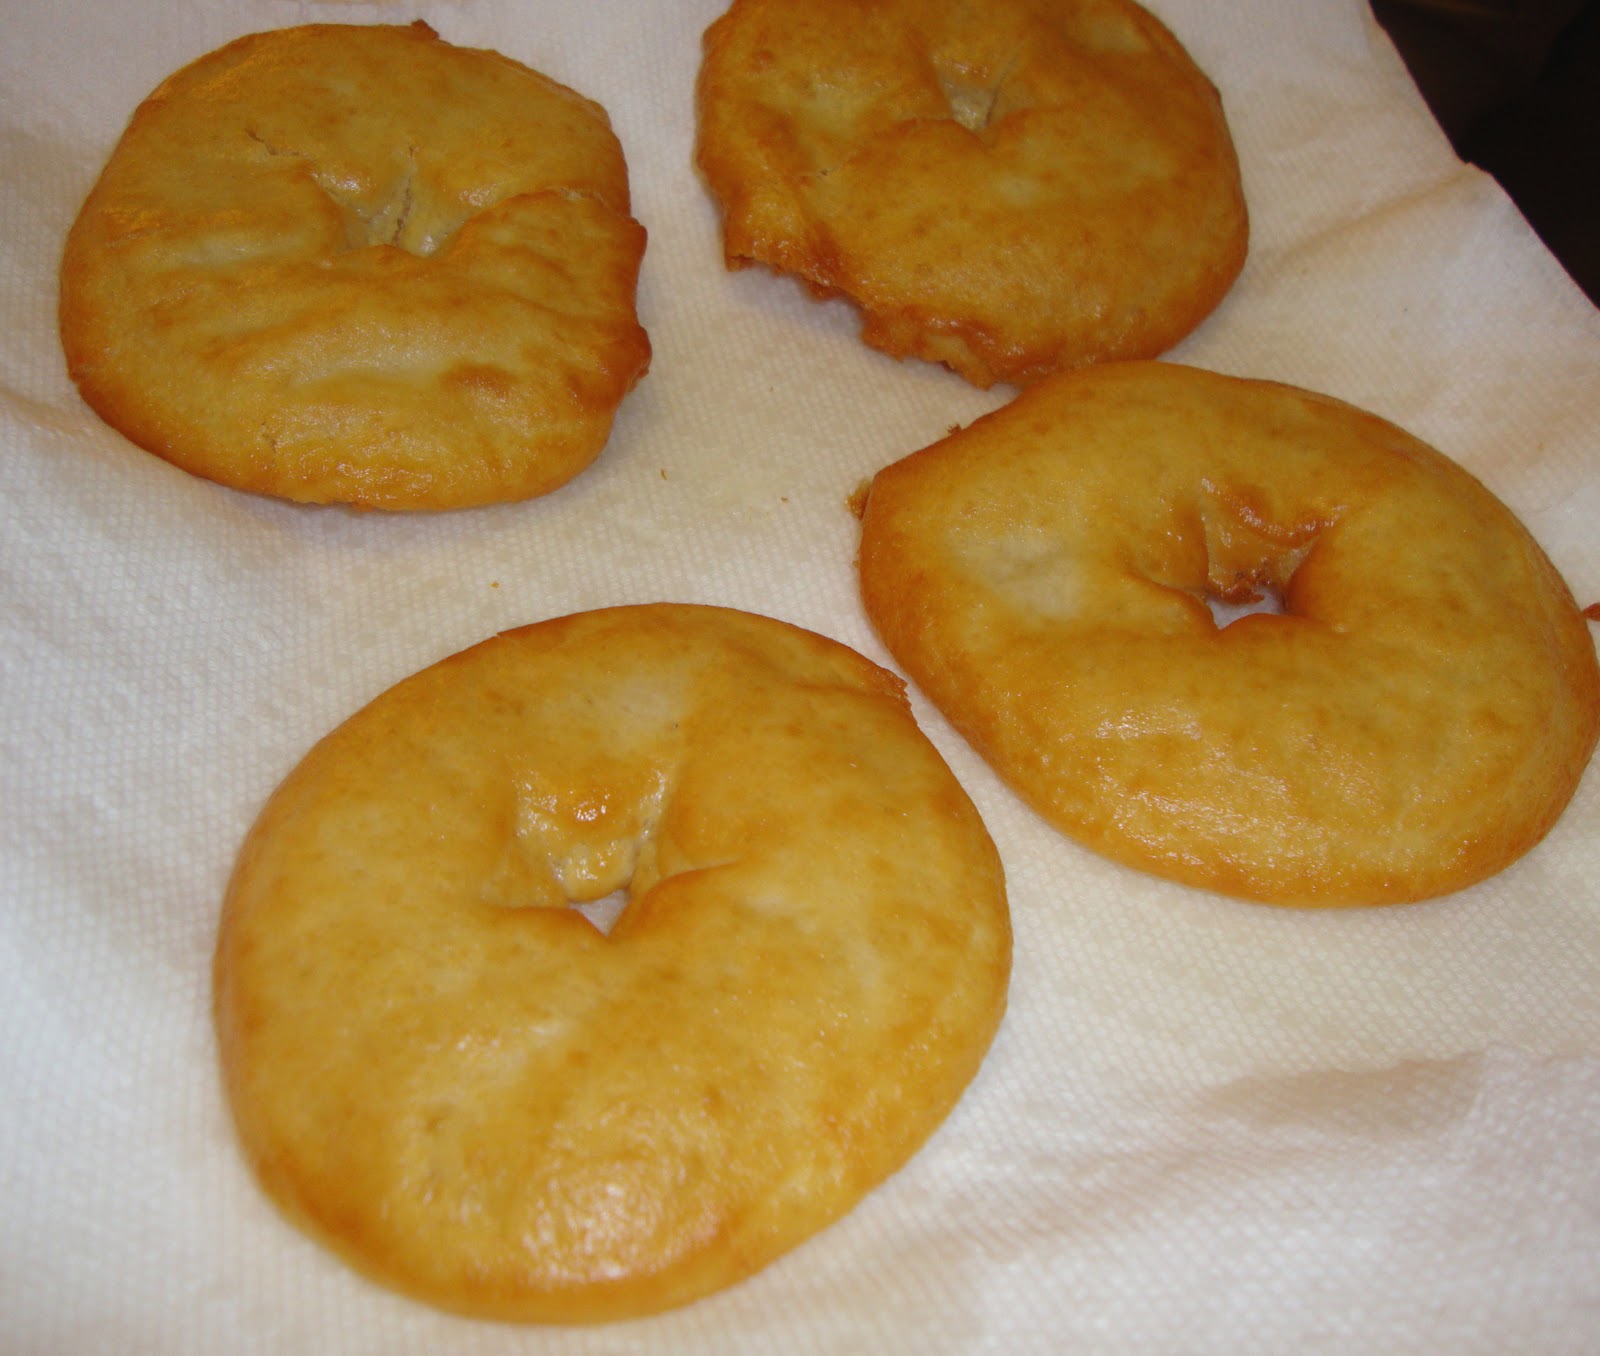
1)      Do not let the shaped doughnuts rise for more than the 1-1 ¼ hours. The first time that I made these, I used the theory of “the longer something has to rise, the bigger and airier it will be.” Apparently, this recipe has a rather short breakdown period. I let the doughnuts rise for about 2 ½ hours and they ended up being rather deflated. They tasted fine, but they were rather unattractive and flat.The second batch rose for only an hour and they were much prettier.

2)      If you are using plastic wrap to cover the shaped doughnuts as they rise, please make sure that it is generously greased. There is nothing as disheartening as getting ready to fry beautiful airy doughnuts, and to have the tops pull off and completely deflate when you pull the covering off.

The second, prettier batch.
Yeast Doughnuts

For the Doughnuts:
1-⅛ C. Whole Milk, Warm
¼ C. Sugar
2-¼ tsp. (One Package) Instant Or Active Dry Yeast
2 Large Eggs, Beaten
10 Tbsp. Unsalted Butter, Melted
4 C. All-Purpose Flour
¼ tsp. Salt
Canola Oil

For the Glaze:
3 C. Powdered Sugar
½ tsp. Salt
½ tsp. Vanilla
½ C. Cold Water Or Milk

To Make the Dough:


Make sure milk is nice and warm, but not overly hot (105-115°F).Add sugar to milk. Stir to dissolve. Add yeast into a small bowl. Pour milk/sugar mixture over yeast. Stir gently, then let sit for 10 minutes.
This should be done with the dough hook attachment, not the whisk. I realized this after I took the picture and didn't remember to get updated pictures.
 Melt butter in separate bowl until almost melted. Stir to finish melting so butter won’t be overly hot. Add beaten eggs to melted butter, stirring constantly to make sure that the eggs don't cook. Add the egg/butter mixture to the bowl of an electric mixer fitted with the dough hook.
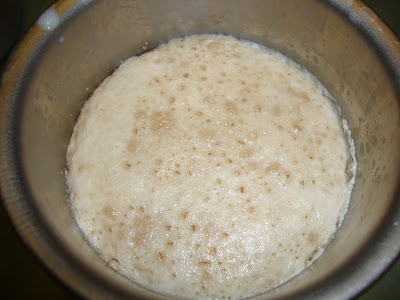
The yeast gets all foamy and happy after 10 minutes.
 With the mixer on 3 (if you have a KitchenAid) or medium-low speed, pour in the yeast mixture. Allow the dough hook to stir this mixture for a couple of minutes, making sure that it is thoroughly combined.

With the mixer still going, add helpings of the flour mixture in 1/4 to 1/2 cup increments until all the flour is gone. Stop the mixer, scrape the bowl, and then turn the mixer on the same speed for five whole minutes.

After five minutes of kneading, you should have a soft, but not overly sticky dough.
 After five minutes, stop the mixer and scrape the bottom of the bowl. Turn on the mixer for 30 seconds. Turn off the mixer and allow the dough to sit in the bowl undisturbed for 10 minutes.

After 10 minutes, transfer dough to a lightly oiled bowl. Toss the dough to coat, and then cover the bowl with plastic wrap and place straight in the fridge. Refrigerate dough for at least 8 hours, or overnight.

To Make the Doughnuts:

The next day, the dough is reminiscent of airy sugar cookie dough.
Remove bowl from fridge and turn out dough onto a lightly floured surface. Roll out to 1/4 to 1/3-inch thickness.
If you do not have a 3-inch or 1-inch round cutter, feel free to use other shapes. The back of a piping tip is also a good substitute. 
Using a 3-inch cutter, cut as many rounds as you can, then roll out remaining dough and cut as much as you can, etc. Cut holes out of each round using a 1 1/2-inch cutter.
Before rising, the doughnuts look similar to sugar cookie cut-outs.
Place both doughnuts and holes on a floured baking sheet. Cover with large tea towel or greased plastic wrap and place in a warm place in your kitchen.
If not allowed to rise for too long, the doughnuts should be nice and fluffy prior to frying.
 Allow doughnuts to rise undisturbed for at least 1 hour; 1 hour 15 minutes if necessary. Doughnuts should be visibly puffier and appear to be airy.

To Fry the Doughnuts:

Heat plenty of canola oil in a large pot until the temperature reaches 375- 380°F —do not let it get hotter than 380! 375 is ideal; keep the thermometer in the pan to continually monitor.


One to two at a time, gently grab doughnuts and ease them into the hot oil. Allow them to cook 1 minute on each side; they will brown very quickly. Remove doughnuts from the oil with a slotted spoon, allowing all oil to drip off.


Place doughnuts immediately on several layers of paper towels. Count to five, then flip it over onto a clean part of the paper towels. Count to five, then flip it over again; the purpose, obviously, is to drain as much grease as possible before it soaks into the doughnut. Repeat with remaining doughnuts and holes. The holes will cook more quickly than the doughnuts; about 30 seconds per side. Allow doughnuts to slightly cool.

To Glaze:

Mix all glaze ingredients in a bowl until completely smooth. One by one, dip doughnuts into the glaze until halfway submerged. (Note: completely submerge doughnut holes, and then remove with slotted spoon). Remove from glaze, then turn right side up on a cooling rack over a cookie sheet (to catch dripping glaze). Serve warm if possible, or room temperature.



Sandwich Bread

Once I saw this recipe, I knew that I had to make it. It makes a wonderful tall loaf of bread that is soft, but sturdy enough to hold up a sandwich. After getting the hang of the original white bread, I started to experiment by adding a tablespoon of garlic powder and oregano to the dough to get an “Italian” version.

We have not bought bread since I discovered this recipe. I’ve been making two to three loaves a week.


American Sandwich Bread

3 ¾ C. All-Purpose Flour
2 tsp. Salt
1 C. Warm Whole Milk (about 110°)
1/3 C. Warm Water (about 110°)
2 tbsp. Unsalted Butter, Melted
3 Tbsp. Honey
1 Envelope (about 2 ¼ tsp.) Instant Yeast

Adjust an oven rack to the lowest position and heat the oven to 200°. Once the oven temperature reaches 200°, maintain the heat for 10 minutes, then turn off the oven.


Mix 3 ½ cups of the flour and the salt in the bowl of a stand mixer fitted with the dough hook. Mix the milk, water, butter, honey and yeast in a 4-cup liquid measuring cup. Turn the machine to low and slowly add the liquid. When the dough comes together, increase the speed to medium and mix until the dough is smooth and satiny, stopping the machine two or three times to scrape dough from the hook, if necessary, about 10 minutes. (After 5 minutes of kneading, if the dough is still sticking to the sides of the bowl, add flour 1 tablespoon at a time and up to ¼ cup total, until the dough is no longer sticky.) Turn the dough onto a lightly floured work surface; knead to form a smooth, round ball, about 15 seconds.


Place the dough in a very lightly oiled large bowl, rubbing the dough around the bowl to coat lightly. Cover the bowl with plastic wrap and place in the warmed oven until the dough has doubled in size, about 40-50 minutes.


On a floured work surface, gently press the dough into a rectangle 1 inch thick and no longer than 9 inches.


With a long side facing you, roll the dough firmly into a cylinder, pressing with your fingers to make sure the dough sticks to itself. Turn the dough seam-side up and pinch it closed.


Place the dough seam-side down in a greased 9×5-inch loaf pan and press it gently so it touches all four sides of the pan. Cover with greased plastic wrap; set aside in a warm spot until the dough almost doubles in size, 20-30 minutes.

Keep one oven rack at the lowest position and place the other at the middle position and heat the oven to 350°. Place an empty baking pan on the bottom rack. Bring two cups of water to boil in a small saucepan. Pour the boiling water into the empty pan on the bottom rack and set the loaf onto the middle rack. Bake until an instant-read thermometer inserted at an angle from the short end just above the pan rim into the center of the loaf reads 195°, 40-50 minutes. Remove the bread from the pan, transfer to a wire rack and cool to room temperature. Slice and serve.


Source: Baking Illustrated